Your Full Guide to Using The HubSpot Chatbot Builder
.png)
The HubSpot Chatbot Builder enables users to seamlessly create chatflows with a bot, helping you connect with your website visitors. HubSpot chatbots offer vast potential to significantly enhance your customer service initiatives. Here, we will be walking with you through the chatflow creation process, step-by-step.
Before You Begin
It's important to note that you'll need to connect a chat channel to a conversations inbox. This is where you can set your team's availability, as well as customize the appearance of the widget. If you're adding a bot to a website that isn't hosted with HubSpot, then you'll need to add the tracking code to your external pages before you create the chatbot. Remember that the bot won't show if the tracking code isn't properly installed. Once you have connected your chat channel to the inbox and installed a tracking code (for any external pages), you can start building your chatbot.
The Building Process
In your HubSpot account:
- Go to Conversations > Chatflows
- Click Create Chatflow
- You have the choice to add the chatflow either on your Website or Facebook Messenger
- Select Website, if you'd like to learn how to add the chatflow to Facebook Messenger, click here
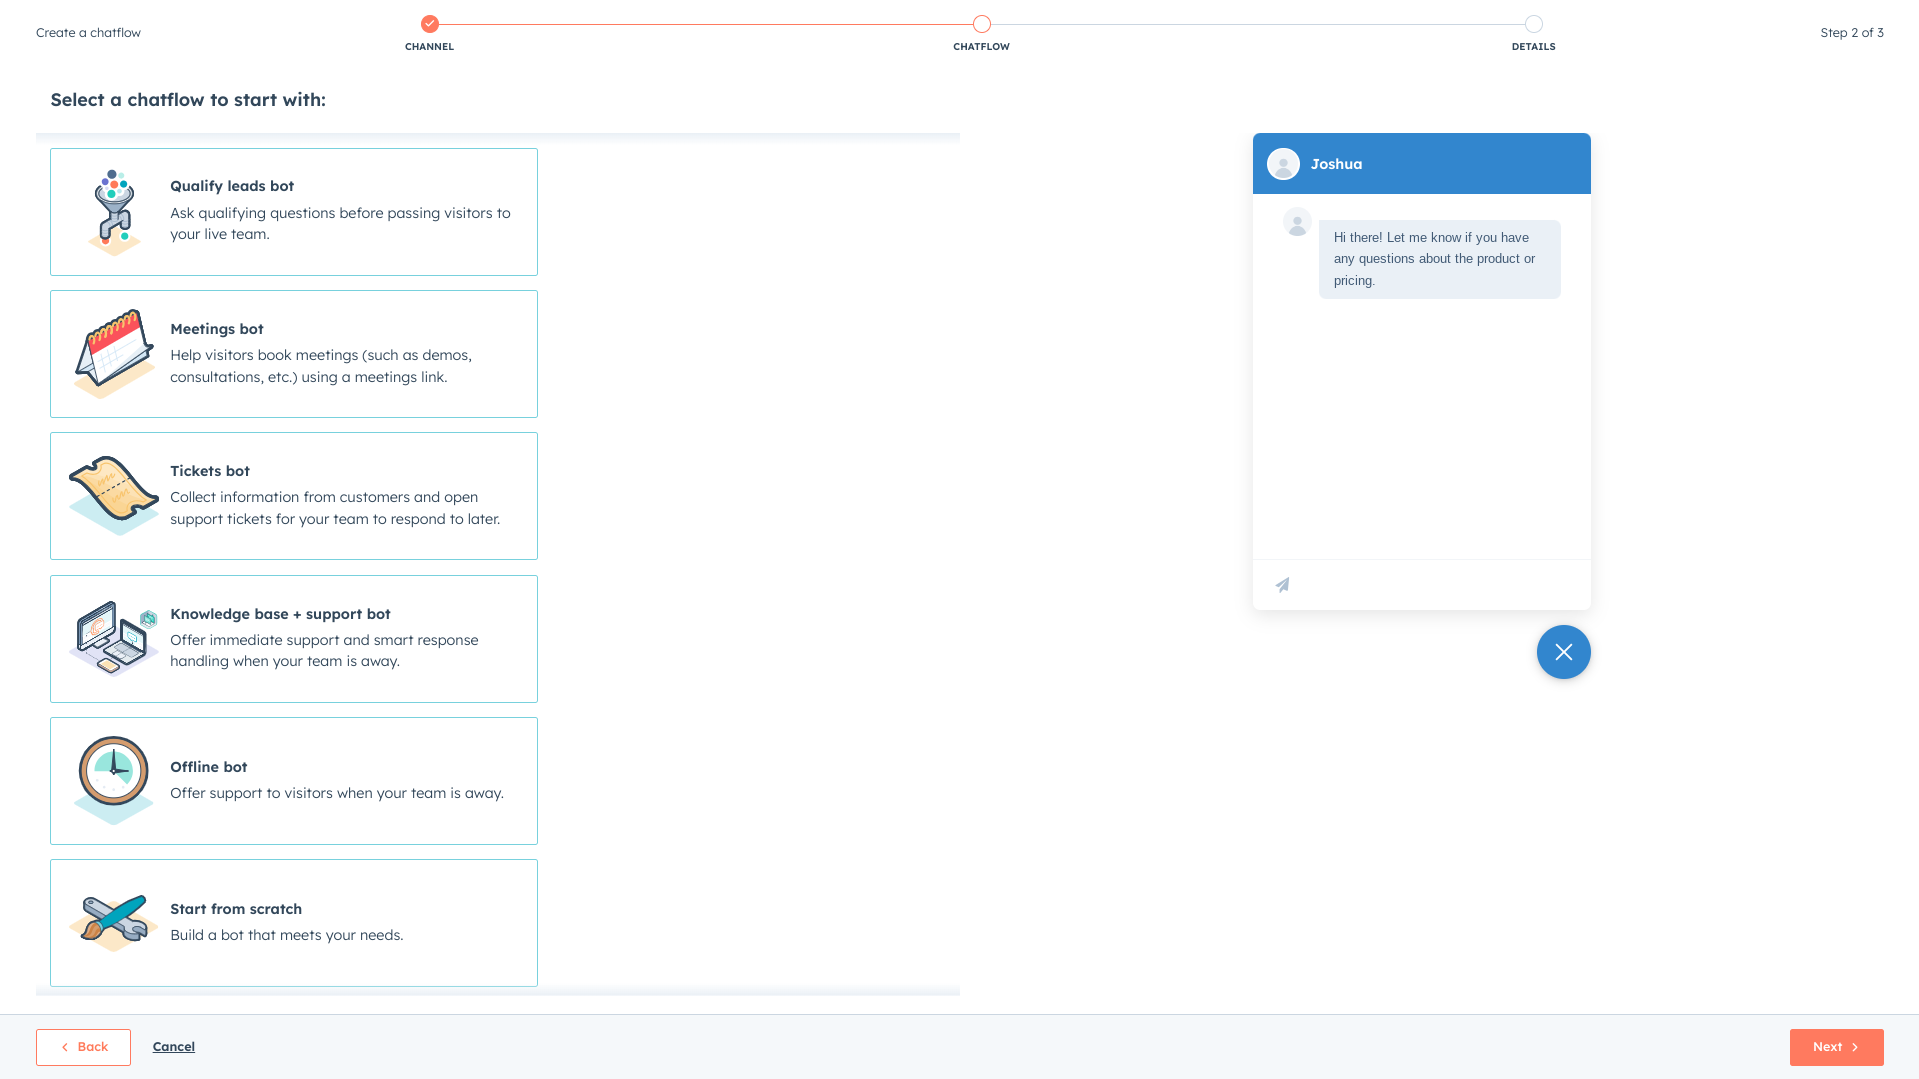
- In the sidebar on the leftside of the screen, you will be shown all of the templates given by HubSpot. You can choose from one of the templates or create from scratch.
Free Plan Features
- Live Chat: Connects visitors with live chat agents based on their availability, facilitating immediate human interaction.
- Qualify Leads Bot: Asks routine qualifying questions to visitors before they are connected to a live agent, streamlining the lead qualification process.
- Meetings Bot: Tasked with scheduling meetings with your team for specific occasions, such as sales or onboarding, making the process of booking meetings efficient and straightforward.
- Tickets Bot: Collects customer query information and creates a support ticket for follow-up, ensuring that all customer issues are addressed in a timely manner
- Start From Scratch: Create your own custom chatbot from scratch using different bot actions
Service Hub Pro Features
- Knowledge Base + Live Chat: Combines the instant support capability of live chat agents with a chatbot familiar with your knowledge base. Visitors have the freedom to choose between interacting with a live agent or getting help from the chatbot, ensuring they receive the desired form of assistance for their needs.
- Concierge Bot: Action-based and designed to provide visitors with options either to speak to a live agent or perform specific tasks. It guides visitors to the help or information they're seeking, offering a more personalized interaction experience.
- Knowledge Base + Support Bot: This conversational AI is capable of handling support queries without the need for live agents. It leverages your knowledge base to provide accurate and helpful answers, making it possible to offer round-the-clock support without additional human resources.
- Offline Bot: Similar to the Knowledge Base + Support Bot but operates when your team is offline. It ensures that your customers receive timely assistance, even outside of your business hours, providing a continuous support experience.
Next, you'll need to customize the inbox and language settings. If you have multiple inboxes, click the inbox dropdown and select accordingly.
- If you're constructing a Meetings bot or a Concierge bot, select the Meetings link dropdown menu to choose which meeting link is shared with your website visitor.
- If you're making a Knowledge base + live support bot or an Offline bot, click the Select inbox users dropdown menu.
- Then, click Create

Welcome Message & Chatbot Actions
Creating an effective welcome message is essential to the success of your chatflow. After all, it's the first thing your visitors see when they start a chat with you. You want your welcome message to make your chatbot feel personable. Make your customer feel valued, using their name and/or letting them know the chatbot is there for them. A pro tip we recommend is to have a different welcome message for each page for your website. It makes the visitor feel as if the bot is going on the journey, that is your website, along their side. It's also important to really know your audience when crafting the welcome message. The information you include and the phrasing of your message should be based on your buyer personas. Keep the message simple and clear so that you don't confuse the customer.
- To edit the welcome message content, click on the Welcome message step in the bot template

Next, you'll be adding your bot actions. Your goal here is to gather the right information from your website visitor. You can ask questions, set a property value, share a knowledge base article, book a meeting, and more.
- To add new questions or actions, click the + icon
If you are a Service Hub Pro or Enterprise user, you have access to if/then branch actions. These allow you to send a visitor to a specific bot action depending on their response, a property value, or your team's availability.
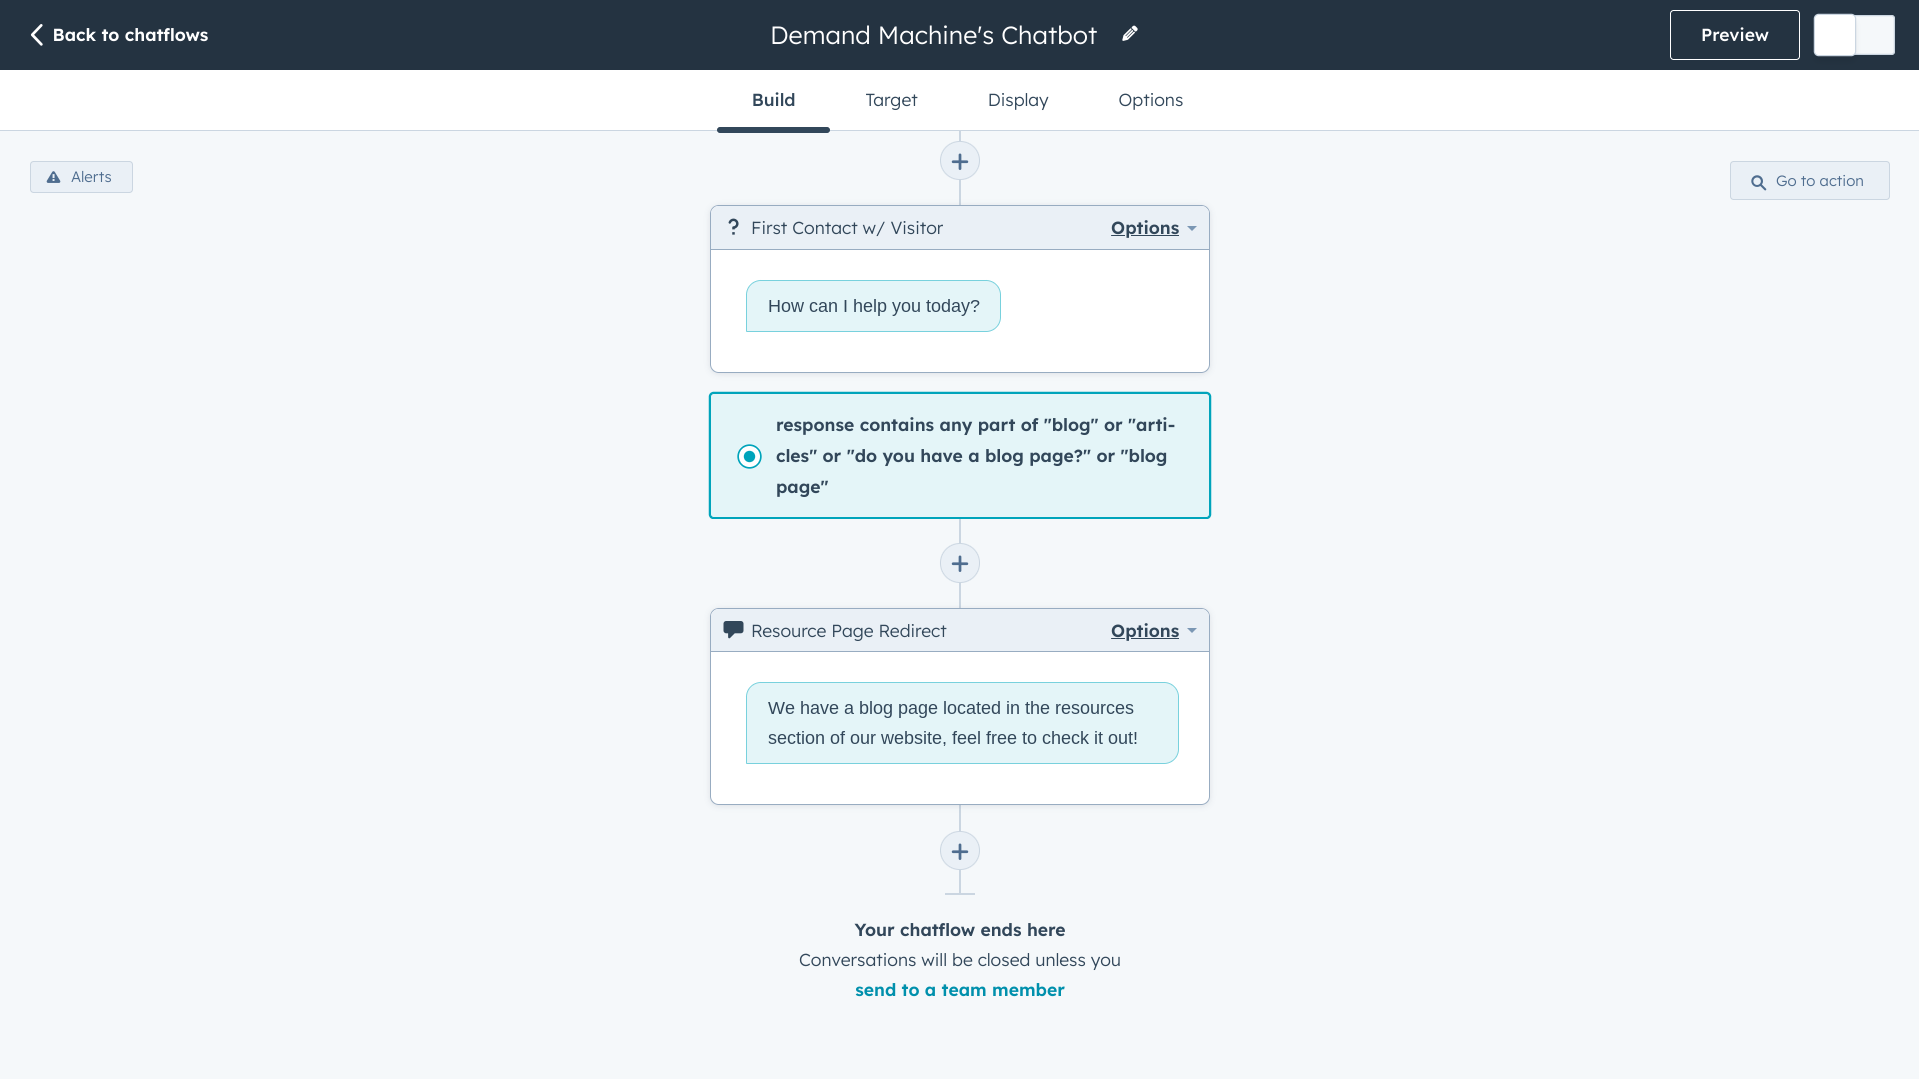
Depending on how you plan to use the chatbot, after gathering the information you need on the visitor, you can direct them to a member of your live team. If you don't have a live team, you can direct them to the conversations inbox, or submit a ticket.
- When you are done, click on the Target tab
Determining When The Chatbot is Displayed
Within the Target tab, you can decide when the chatbot will show up on your website pages. For example, your bot can be displayed when your visitor is on a certain URL. Additionally, you can set the bot to only appear when it has gathered data that meets a specific criteria. For example, the bot message will only display if your visitor's browser language is English.

- To continue, click Save, then click on the Display tab
Customizing Chatbot Appearance
Within the Display tab, you can edit the chatbot's display settings. This includes customizing the heading, display behavior, and timing controls of the chat. You can also edit the bot's accent color and placement on the page. Remember to set your desired chatbot display for both desktop and mobile visitors.
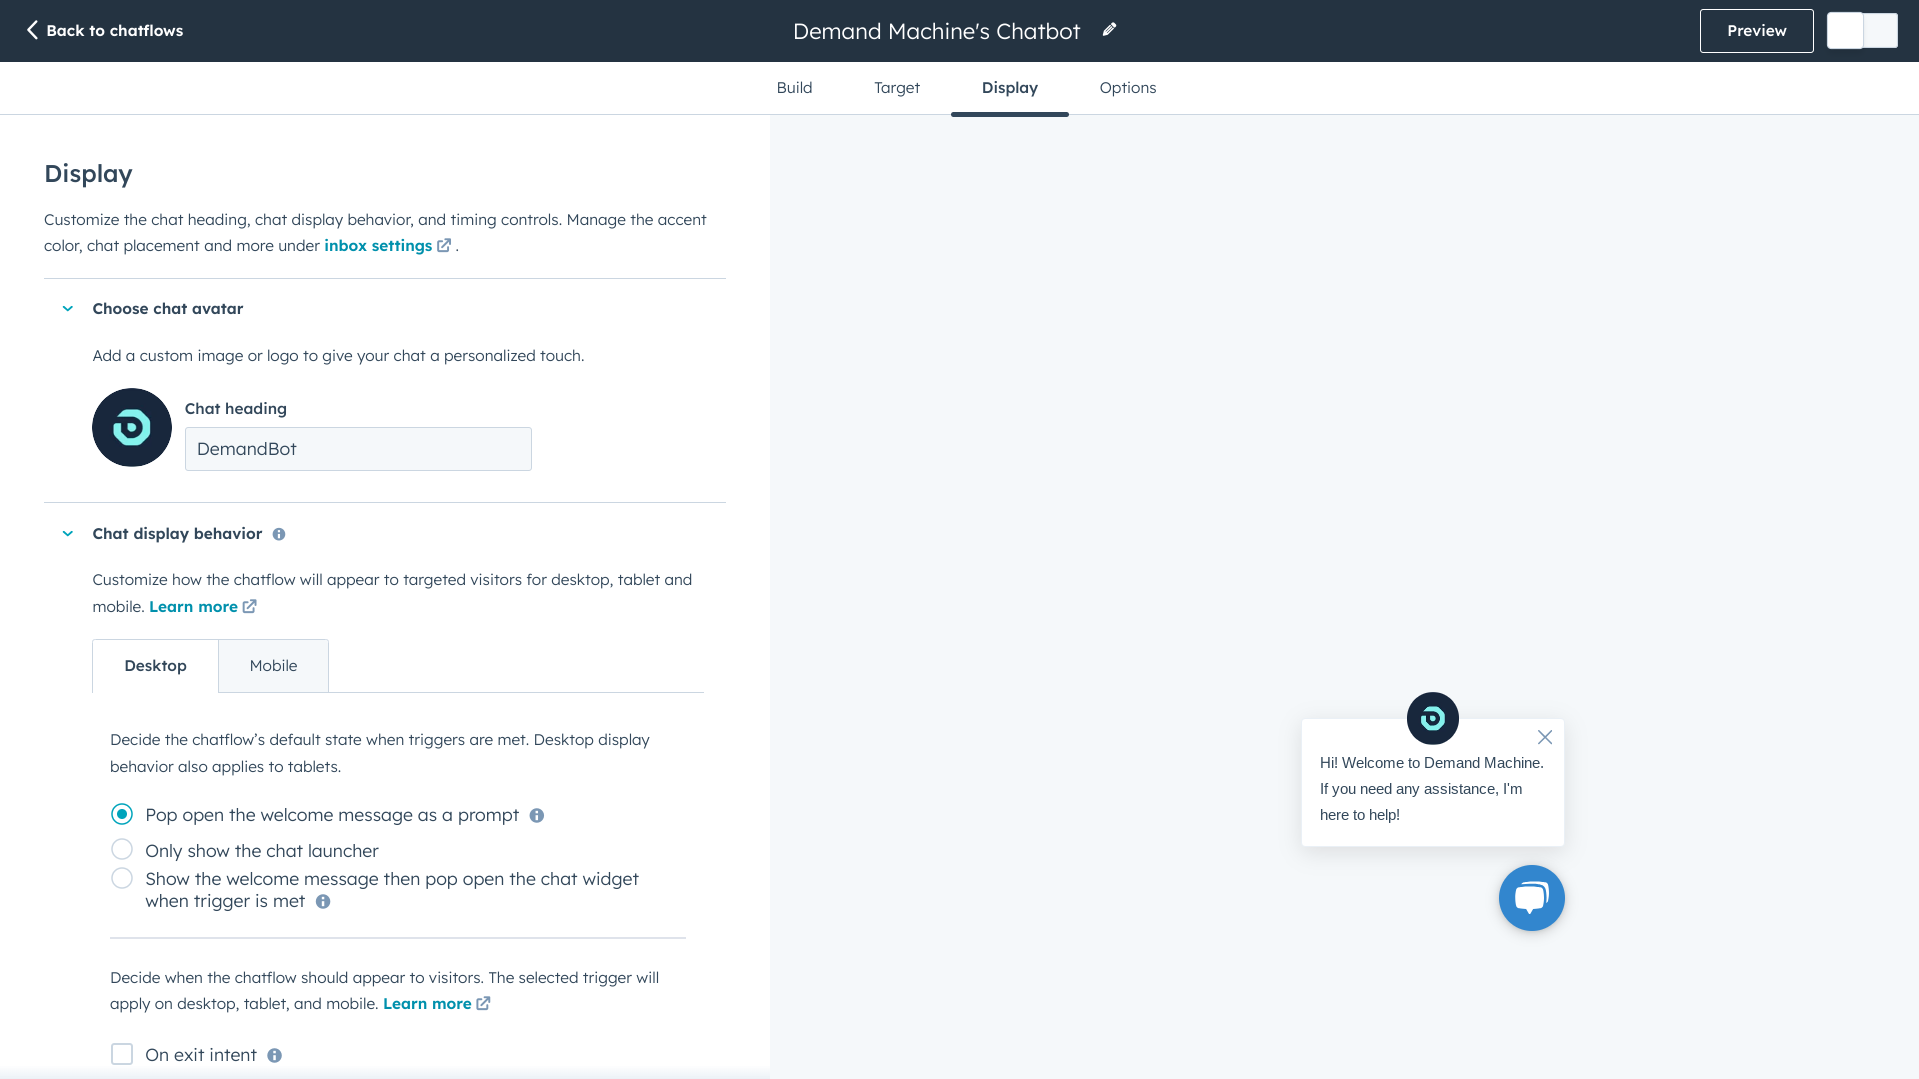
When you're done here, click Save, then click on the Options tab
Additional Options
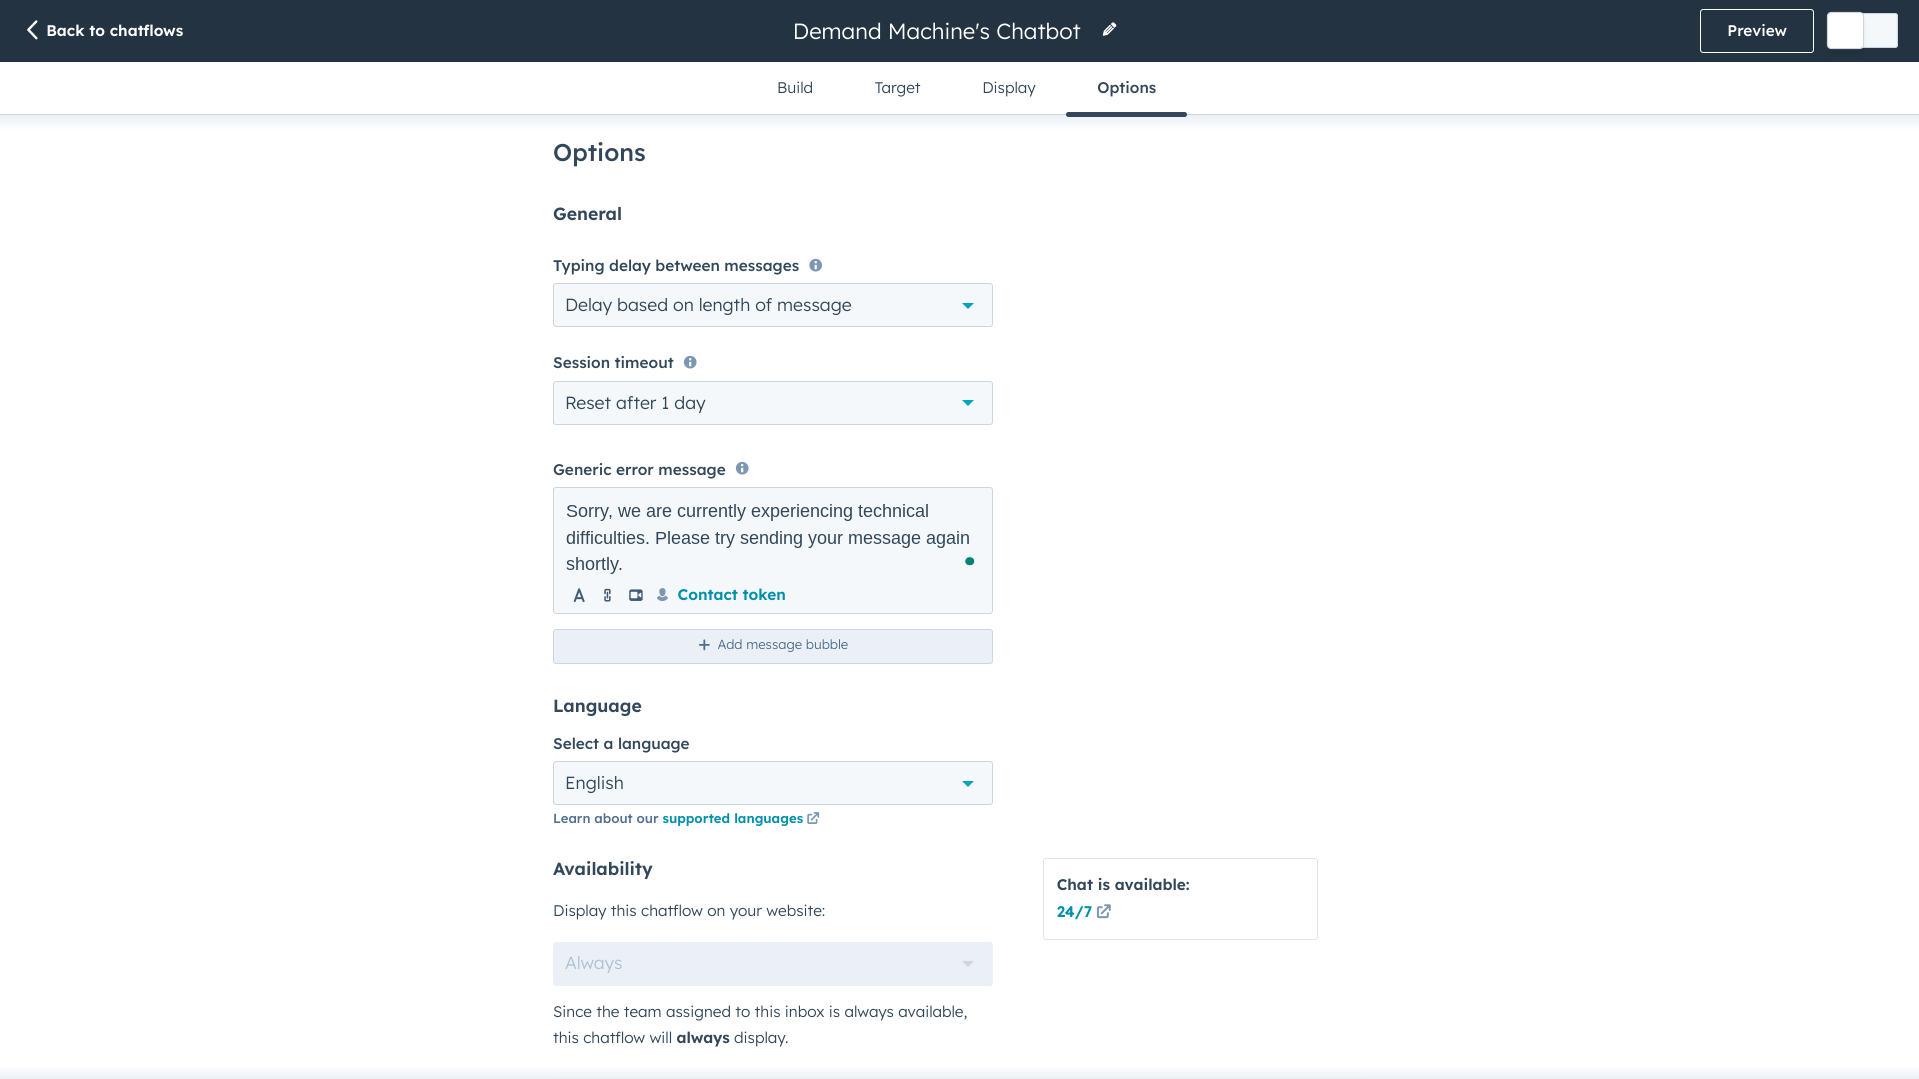
Within the Options tab, you can:
- set the Typing delay between messages
- set the Session timeout reset frequency
- craft a Generic error message
- set the desired Language
- change the bot's Availability (may change depending on the selected bot template)
You can also configure your chatbot's Data privacy & consent options:

To gain visitor feedback once the conversation is closed, you can create and connect a CSAT survey to your chatflow.
Review
Once you've finished constructing your HubSpot chatbot, you can click the Preview button in the top right-hand corner of your screen. When you're satisfied with your chatbot, you can click the toggle icon (next to the Preview button) and have it go live. Now, visitors can start a conversation with your chatbot on your website. You can view and respond to incomming messages within your conversations inbox, as well as track your bot's performance metrics.
If you have any more questions regarding the HubSpot Chatbot Builder, need help creating custom chatbots, or are looking to improve upon any other business processes, contact us today!
